
Main Courses
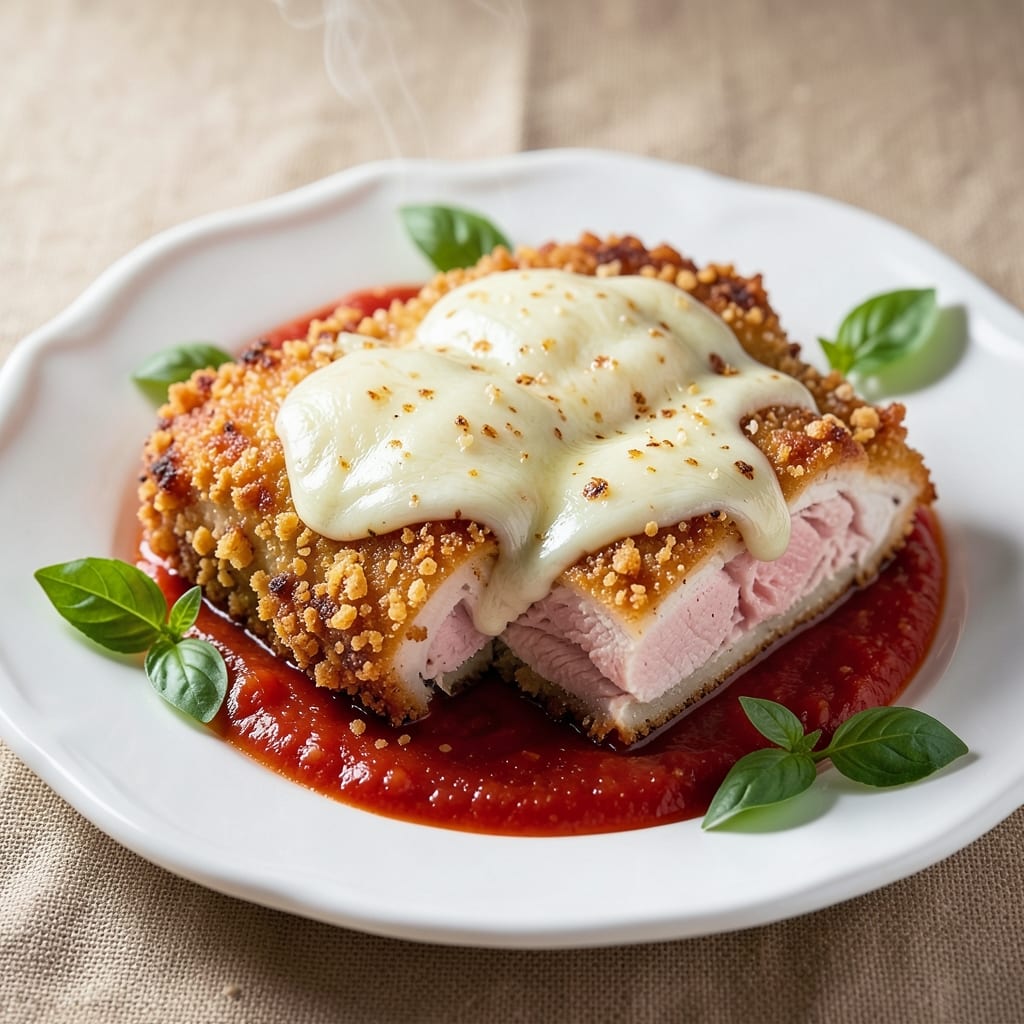
This baked breaded chicken parmesan recipe delivers the ultimate comfort food experience—crispy golden breading, tender chicken, and rivers of melted mozzarella that make every bite irresistible. I perfected it after years of testing different breading techniques, and the secret lies in that triple-layered coating that stays crisp even after baking. The first layer of seasoned flour creates a sturdy base, while the second layer of breadcrumbs adds texture, and the final coating of crushed cornflakes guarantees that satisfying crunch.
What sets this recipe apart is the balance between traditional techniques and modern shortcuts. We start with a simple marinara sauce that simmers just long enough to develop rich flavor without overpowering the chicken, then top it with a generous layer of mozzarella and parmesan that melts into gooey perfection. The oven does all the heavy lifting while you prepare your favorite sides—think creamy pasta or a fresh garden salad to round out the meal. This is the kind of dish that transforms an ordinary weeknight into a restaurant-quality experience.
The result is chicken that's perfectly golden on the outside, juicy on the inside, and topped with bubbling cheese that stretches into delicious rivers when you cut into it. The breading stays crisp thanks to a quick broil at the end, and the sauce underneath adds moisture that keeps the chicken tender. This recipe serves four, making it ideal for family dinners or casual gatherings where everyone wants seconds. The best part? It's easier than it looks, and the payoff is worth every minute of effort.
For those looking to adapt this classic, you can use gluten-free breadcrumbs for the second layer or even try an air-fryer method for a lighter version. The key is patience—letting the breading set properly before baking ensures that crispy texture we all love. Once you try this version, you'll never go back to the deep-fryer method again. Let's get started on creating your own crispy, cheesy masterpiece.
Ingredients for baked breaded chicken parmesan
Here's what you'll need to create that triple-layered, crispy, cheesy chicken masterpiece.
| Ingredient | Amount | Notes |
|---|---|---|
| Boneless, Skinless Chicken Breasts 🍗 | 1 ½ lb | Pounded to even thickness |
| All-Purpose Flour 🌾 | 1 cup | For first breading layer |
| Italian Seasoned Breadcrumbs 🍞 | 1 ½ cups | Panko works too |
| Crushed Cornflakes 🍞 | ½ cup | For final crispy layer |
| Large Eggs 🥚 | 2 whole | Beaten for egg wash |
| Parmesan Cheese 🧀 | ½ cup | Freshly grated from block |
| Fresh Mozzarella Cheese 🧀 | 8 oz | Low-moisture or fresh |
| Marinara Sauce 🍅 | 1 ½ cups | Store-bought or homemade |
| Garlic Cloves 🧄 | 3 cloves | Minced for marinara |
| Extra-Virgin Olive Oil 🫒 | ¼ cup | For breading and sauce |
| Dried Oregano 🌿 | 1 tsp | For flour seasoning |
| Ground Black Pepper 🌶️ | ½ tsp | Freshly ground preferred |
| Diamond Crystal Kosher Salt 🧂 | 1 tsp | For seasoning |
| Fresh Basil Leaves 🌿 | ¼ cup | Chopped for garnish |
The chicken breasts are the foundation—look for evenly sized pieces at the store, around 6 oz each. Trader Joe's and Whole Foods usually have the best quality, but any supermarket works. Pound them to about 1/4-inch thickness so they cook evenly. The breadcrumbs are non-negotiable for texture—Italian seasoned gives that authentic flavor, but plain works if that's what you've got. For the cornflakes, crush them fine in a food processor or bag with a rolling pin. That final layer makes all the difference for that crispy finish everyone loves.
No Italian seasoned breadcrumbs? Mix plain breadcrumbs with 1 tsp Italian seasoning. Fresh mozzarella is ideal (that soft, milky kind), but low-moisture shredded works too. The Parmesan should be freshly grated—pre-grated gets clumpy and doesn't melt right. Marinara sauce? Rao's or Muir Glen are my go-tos for jarred, but homemade is better if you've got time. Skip the garlic in the jar—fresh minced garlic takes 30 seconds and makes a world of difference. For the cornflakes, any brand works, but Kellogg's crushes the easiest.
Chicken stays fresh for 2 days in the fridge—use it within that time for best results. The breadcrumbs and cornflakes keep indefinitely in airtight containers. Once breaded, you can prep the chicken ahead and refrigerate it for up to 6 hours before baking. The leftovers? 3-4 days in the fridge, or freeze for 2 months. I always make extra—it disappears fast around here, especially when I add that extra sprinkle of Parmesan before serving.
Why You'll Love This Recipe
- No-Fuss Crispiness: I swear by the crushed cornflakes trick—it’s the secret to that perfect crunch without frying. No deep-frying mess, no waiting for oil to heat, just golden, shatteringly crisp edges every time.
- Weeknight Hero: Between us, this is the dish that saved my dinners after work. Toss the chicken in flour, dip in egg, coat in those herby breadcrumbs, and it’s done in 40 minutes—no one’s complaining when it’s ready.
- Leftovers That Work: Honestly, I make a double batch on Sundays. The breading stays crispy when reheated, and it’s perfect cold in sandwiches or salads. My kids even ask for it the next day—rare for them.
- Budget-Friendly Feast: Chicken breasts stretch further than you’d think when paired with pasta or a simple salad. The cornflakes add bulk to the coating, so you’re not drowning in expensive breadcrumbs. Plus, it feels fancy for next to nothing.
Step-by-step instructions for baked breaded chicken parmesan
Let's create that perfect triple-layered crunch with gooey cheese rivers—no frying required.
Prepare the Chicken for Breading
Start by pounding the 1.5 lb boneless, skinless chicken breasts to an even ½-inch thickness between two sheets of plastic wrap using a meat mallet. This ensures even cooking and crispy breading. Pat the chicken dry with paper towels—this step is crucial for maximum crispiness.
Season both sides generously with 1 teaspoon Diamond Crystal kosher salt and ½ teaspoon ground black pepper. Place the seasoned chicken on a plate and set aside. We'll bread it immediately after preparing the station, so keep everything within reach.
Set Up the Breading Station
Create three separate bowls for your breading station. In the first bowl, combine the 1 cup all-purpose flour with 1 teaspoon dried oregano. This first layer will create a sturdy foundation for the breading.
In the second bowl, beat the 2 whole large eggs lightly with a fork until just combined. The eggs should be smooth but still slightly thick—overbeating will make the breading too wet. In the third bowl, mix the 1.5 cups Italian seasoned breadcrumbs with the ½ cup crushed cornflakes and ½ cup freshly grated Parmesan cheese. This final layer will give you that signature crispy texture.
Bread the Chicken Thoroughly
Working with one piece at a time, dip each chicken breast into the flour mixture, pressing gently to adhere. Shake off any excess, then dip into the beaten eggs, allowing any excess to drip off. Finally, press the chicken into the breadcrumb mixture, coating all sides completely. Place the breaded chicken on a wire rack set over a baking sheet—this allows air to circulate and prevents soggy breading.
Repeat with all pieces. For best results, bread the chicken just before baking. If you need to prepare ahead, bread the chicken and refrigerate on a wire rack for up to 1 hour before baking, but no longer—this helps the breading set.
Assemble and Bake the Chicken Parmesan
Preheat your oven to 425°F and line a baking sheet with parchment paper. Arrange the breaded chicken breasts on the prepared baking sheet. In a small bowl, combine the 1.5 cups marinara sauce with the 3 minced garlic cloves and ¼ cup extra-virgin olive oil. Spoon about ¼ cup of this mixture over each piece of chicken, spreading it evenly to the edges.
Top each piece with 2 ounces of the fresh mozzarella cheese, dividing the 8 oz total evenly. The cheese should melt into glorious rivers when baked. Bake for 18-22 minutes until the chicken reaches an internal temperature of 165°F and the breading is deep golden brown and crispy.
Finish and Serve
Remove the chicken from the oven and let it rest for 3-5 minutes before serving. The cheese should be bubbling and slightly pulled in places, creating those signature gooey rivers. Garnish each piece with 1 tablespoon of the chopped fresh basil leaves and an extra drizzle of marinara sauce if desired.
Serve immediately with a side of pasta, crusty bread, or a fresh salad. The breading should be perfectly crispy, the cheese gooey and stretchy, and the chicken juicy and tender. Enjoy your restaurant-quality baked chicken parmesan!
Pro Tips For Making Baked Breaded Chicken Parmesan
- Pound Flat Before Breading: Chicken breasts stay thick and dry when baked—flatten them to ¼-inch with a meat mallet or rolling pin. This ensures even cooking and a crispy crust in the oven, not a soggy middle. (Yes, it’s tedious, but it’s the difference between "meh" and "wow.")
- Mix Cornflakes Last: Toss crushed cornflakes with breadcrumbs after dredging in flour—this keeps them crispy, not mushy. I used to mix them in early, and the coating turned into a sad, gluey paste. Save them for the final shake.
- Bake at 425°F First: Start hot to sear the breading, then drop to 375°F once golden. After burning three batches at 350°F, I learned: high heat = instant crust, low heat = finished chicken without burning. (Pro move: Use a wire rack for airflow.)
- Egg Wash in Two Stages: Dip chicken in egg once, let excess drip off, then dip again in a second egg wash mixed with 1 tablespoon milk or water. The extra moisture helps the breading stick—no more patches or falling-off disasters. (Trust me, this is the thing that matters most.)
Essential equipment for this dish
Must-Have Baking Tools
First, you'll need a good baking sheet—I recommend a half-sheet pan (18x13 inches) with high edges to catch any cheese drips. A wire cooling rack placed over the baking sheet is a game-changer—it keeps the breading crispy by allowing air circulation. My go-to is the Ozeri 18-inch Wire Cooling Rack from Amazon, but any sturdy rack works. 🌡️
For pounding the chicken, a meat mallet is essential. I use the Norpro 10-ounce one—it's lightweight but packs enough force to flatten those breasts evenly. If you don't have one, a rolling pin in a pinch works, but it takes more elbow grease. A sharp chef's knife and cutting board are obvious musts, but don't skimp on quality here—dull blades tear the chicken instead of cleanly slicing.
Breading Station Essentials
Your breading station needs three shallow bowls—I use glass mixing bowls (like the Pyrex 8-cup set) because they're easy to clean and let me see the consistency of each layer. A fork for beating eggs and a small whisk for mixing the marinara sauce are handy. For crushing cornflakes, a food processor or ziplock bag with a rolling pin works perfectly. I've tried blenders, but they make too much dust.
A measuring spoon set is crucial for accurate seasoning—especially that 1 tsp oregano and ½ tsp black pepper. I love the OXO Good Grips set because the handles don't slip. For grating Parmesan, a microplane gives you the freshest, finest shreds. Pre-grated cheese is convenient but lacks that restaurant-quality melt. 🧀
Oven and Temperature Control
Your oven needs to be preheated to 425°F—this is non-negotiable for that perfect crisp. I use an infrared thermometer (like the Thermoworks IR800) to verify my oven's accuracy—some home ovens run hot or cold. If you don't have one, use an oven thermometer placed near the baking rack during preheating. For even baking, position the rack in the middle of the oven where heat circulates most evenly.
For that final crisp, you'll need to broil for 1-2 minutes at the end. Keep a close eye on it—broilers can vary wildly. I always use oven mitts (the Ozeri Touch-N-Go ones are my favorite) to protect my hands from the sudden heat surge. A timer is a must—set it for the full 18-22 minutes plus those final broil minutes to avoid burning.
Budget-Friendly Swaps
No wire rack? No problem—use a clean, dry cookie sheet with a wire mesh (like from a colander) draped over it. For crushing cornflakes, a ziplock bag and rolling pin works just as well as a food processor. I've even seen people use the bottom of a coffee mug to press breadcrumbs into place—it's not ideal, but it gets the job done in a pinch. 💡
Skip the fancy tools entirely and focus on the three essentials: baking sheet, wire rack, and meat mallet. The rest can be improvised. My grandmother used whatever she had—a wooden spoon for stirring marinara, a butter knife for spreading cheese—and still made the most delicious chicken parmesan. The key is technique, not equipment, but having the right tools makes it so much easier.
Nutrition facts
Frequently asked questions
Why does the breading turn soggy?
Soggy breading usually happens when the chicken isn't fully dried before breading or the sauce gets too close to the breading while baking. Always pat the chicken very dry with paper towels before seasoning, and use a wire rack over the baking sheet to let air circulate. If your oven runs hot, consider reducing the temperature to 400°F for the first 15 minutes to prevent steaming.
Can I use chicken thighs instead of breasts?
Yes! Chicken thighs work beautifully—they stay juicier and have more flavor. Just increase the baking time to 25-30 minutes (until 175°F internal temp) and reduce the oven temp to 400°F to prevent overcooking. The skin-on version adds extra crispiness if you leave it on during baking. For thighs, use 1.5 lbs (about 4 large thighs).
How do I make this gluten-free?
Replace the flour with 1 cup gluten-free all-purpose flour blend (like Bob's Red Mill 1:1) and use gluten-free breadcrumbs for the middle layer. For the final crispy layer, try crushed gluten-free cornflakes or crushed pork rinds. The cornflakes add airiness while pork rinds give extra crunch. Just make sure all your ingredients are certified gluten-free to avoid cross-contamination.
What's the best way to reheat leftovers?
Reheat in a 350°F oven for 10-12 minutes on a baking sheet to maintain crispiness. For a quick fix, use the air fryer at 375°F for 3-4 minutes—this restores the crunch better than the microwave. Never reheat in the microwave without covering with a damp paper towel first, as this helps preserve texture. Leftovers taste best within 3 days when stored properly.
Can I make this ahead of time?
Bread the chicken completely and refrigerate on a wire rack for up to 6 hours before baking. For meal prep, assemble the chicken with sauce and cheese (but don't bake yet) and freeze on a baking sheet for 1 hour, then transfer to a freezer bag. Bake from frozen at 400°F for 30-35 minutes, adding 5-10 minutes to the original time. The breading may need a 2-minute broil at the end for extra crisp.