
Main Courses
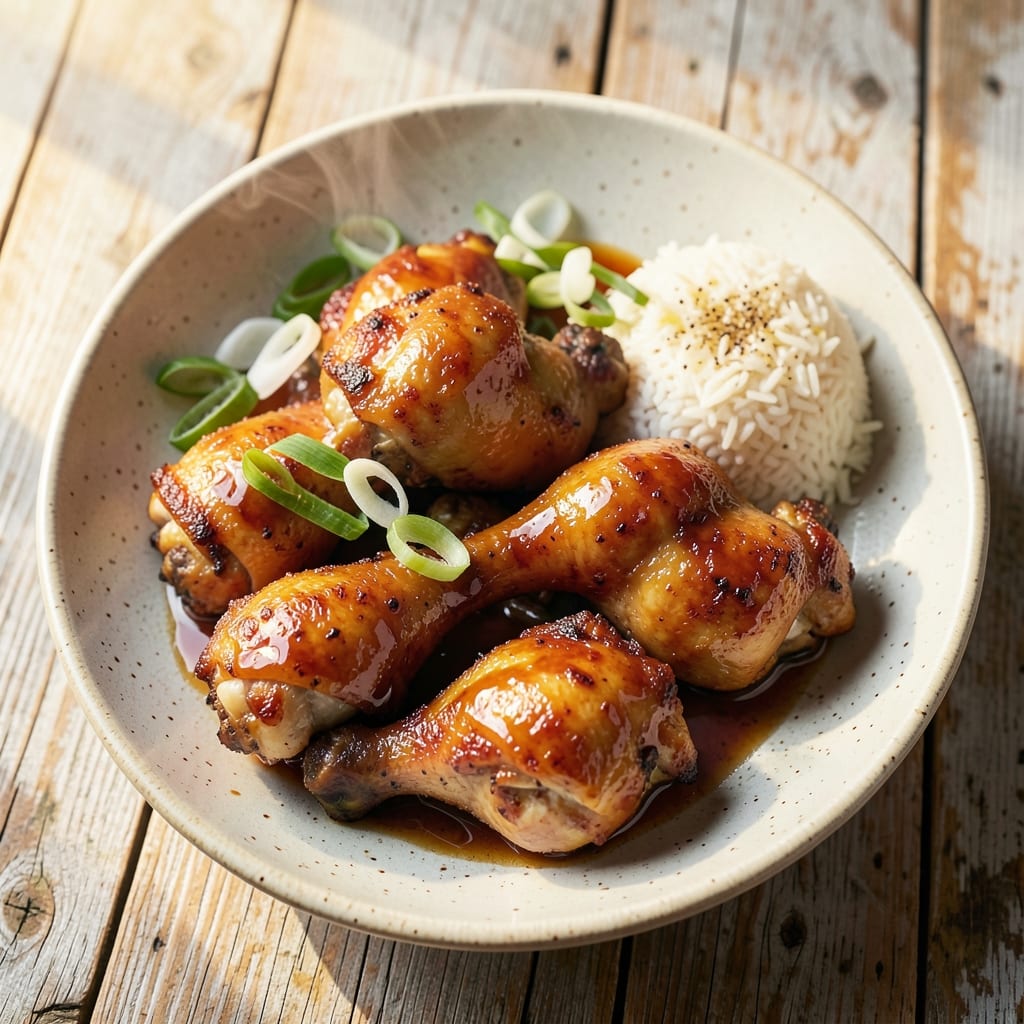
This baked teriyaki chicken legs recipe delivers restaurant-quality results with minimal effort—crispy skin, sticky-sweet glaze, and tender meat that falls off the bone. I perfected this after years of experimenting with my grandmother's vague notes about "letting the sauce caramelize slow," which translated into golden-brown perfection in my oven. The secret lies in baking, not frying, for that coveted texture without the mess.
What sets this apart is the balance: a homemade teriyaki glaze that's rich but not cloying, with just enough ginger and garlic to wake up the chicken. You'll marinate the legs for at least 30 minutes (overnight is better), then bake them at 400°F until the skin is blistered and the sauce bubbles like amber syrup. No deep-frying required—just patience and a hot oven.
The result? Juicy chicken with skin so crisp it shatters like glass, every bite coated in that glossy, caramelized glaze that's sweet, tangy, and just a little smoky. Serve it over steamed rice or with roasted vegetables for a meal that feels indulgent but comes together in under an hour. This is the kind of dish that makes weeknight dinners feel special.
Pro tip: Save the leftover glaze for brushing on during the last 5 minutes of baking—it intensifies the flavor and creates that signature sticky finish. Trust me, your taste buds will thank you. Let's make this teriyaki magic happen.
Ingredients for baked teriyaki chicken legs
Four juicy chicken legs plus a few pantry staples transform into restaurant-style teriyaki magic.
| Ingredient | Amount | Notes |
|---|---|---|
| Chicken Legs 🍗 | 4 whole | Bone-in, skin-on for crispy texture |
| Teriyaki Sauce 🍶 | 1 cup | Store-bought or homemade (see notes) |
| Honey 🍯 | 2 tbsp | For glaze sweetness and stickiness |
| Soy Sauce 🥢 | 3 tbsp | Use low-sodium for balance |
| Garlic Cloves 🧄 | 4 cloves | Minced for marinade depth |
| Fresh Ginger 🌿 | 2 tbsp | Grated, for zesty kick |
| Olive Oil 🫒 | 1 tbsp | For crispy skin development |
| Brown Sugar 🍚 | 2 tbsp | Enhances caramelization |
| Sesame Oil 🌰 | 1 tsp | Toasted sesame flavor |
| Cornstarch 🌾 | 1 tsp | For glaze thickening |
| Salt 🧂 | 1 tsp | Kosher for even seasoning |
| Black Pepper 🌶️ | ½ tsp | Freshly ground for heat |
| Rice Vinegar 🍶 | 1 tbsp | Balances sweetness |
| Sesame Seeds 🌰 | 1 tsp | For garnish and crunch |
The chicken legs are non-negotiable—bone-in and skin-on for that crispy skin you crave. Trader Joe's has the best prices on these, or check the butcher section at Whole Foods for organic options. Fresh ginger and garlic? Grab them at the farmers market if you can—they've got more punch than the grocery store. For the teriyaki sauce, I usually make my own (honey, soy, garlic, ginger), but Kikkoman or Lee Kum Kee work in a pinch. Just skip the sugar-heavy versions—they'll make your glaze too sweet.
No honey? Maple syrup works 1:1—just know it's a little thicker. Short on soy sauce? Coconut aminos give a similar umami punch. Fresh ginger too strong? Dried works at half the amount. The cornstarch is key for that glossy finish—don't skip it. And if you're feeling fancy, toasted sesame oil (not the regular kind) adds next-level flavor. Pro move: Save half the sauce for brushing on during the last 5 minutes—it's what makes the skin crackle like magic.
Marinate the chicken for at least 30 minutes (overnight is better)—it's worth it. The sauce keeps for 1 week in the fridge, but the chicken? 2 days max in the fridge, or freeze for 3 months. I always bake a big batch and portion the leftovers—freeze them on a tray first so they don't stick together. The glaze reheats beautifully, so save some for next time. Trust me, you'll want seconds.
Why You'll Love This Recipe
- One-Pan Magic: I swear by this recipe when I’m too tired to scrub pots—just toss the chicken legs, garlic, and sauce on a sheet pan, and 40 minutes later, you’ve got dinner. The sticky glaze caramelizes right there, no flipping or fussing required.
- Sweet-Savory Balance: That honey-soy glaze? It’s the kind of flavor that makes you pause mid-bite—garlicky depth from the cloves, a touch of smoky richness from the soy, and just enough sweetness to make it irresistible. My kids fight over the last piece.
- Meal Prep MVP: I make a double batch every Sunday because reheating these leftovers is a game-changer—crispy edges stay crispy, and the sauce doesn’t turn rubbery. Pack them for lunches or toss them into rice bowls all week.
- Budget Dinner Win: Chicken legs are my go-to for feeding the whole family without breaking the bank, and this recipe stretches the sauce to coat every bite perfectly. Honestly, it’s the kind of meal that makes grocery day feel like a victory.
Step-by-step instructions for baked teriyaki chicken legs
Here's how to achieve that perfect balance of crispy skin and glossy glaze every time.
Marinate the Chicken Legs for Maximum Flavor
In a large bowl, combine the 1 cup teriyaki sauce, 2 tbsp honey, 3 tbsp soy sauce, 2 tbsp fresh ginger (finely grated), 4 cloves garlic cloves (minced), 1 tbsp rice vinegar, 1 tsp sesame oil, 1 tsp salt, and 0.5 tsp black pepper. Mix until the brown sugar is fully dissolved and the marinade has a smooth, sticky consistency.
Add the 4 whole chicken legs to the bowl, turning them to coat completely. Let them marinate in the refrigerator for at least 4 hours or overnight for deeper flavor penetration. The longer they marinate, the more tender and flavorful they'll become. I like to leave them in the fridge overnight—it makes all the difference in the final texture and taste.
Prep the Glaze and Preheat the Oven
In a small bowl, whisk together 2 tbsp brown sugar, 1 tsp cornstarch, and 1 tbsp rice vinegar to create a thick, glossy glaze. This mixture will give your chicken that signature sticky, caramelized finish. Set this aside while you preheat your oven to 425°F. I always use the highest rack position for even browning and crispy skin development.
Line a baking sheet with aluminum foil for easy cleanup, then place a wire rack on top. This rack allows hot air to circulate underneath the chicken, ensuring crispy skin all around—not just on the top. While the oven preheats, pat the marinated chicken legs dry with paper towels. Removing excess moisture is crucial for achieving that perfect crispy texture we're after.
Bake to Golden Perfection
Place the marinated chicken legs on the wire rack, skin-side up. Bake for 30 minutes to render the fat and start developing that crispy skin. After 30 minutes, flip the chicken legs skin-side down and brush generously with half of the glaze mixture. Return to the oven and bake for another 15 minutes until the skin is deep golden brown and crispy.
Here's where it gets exciting—flip the chicken legs back skin-side up and brush with the remaining glaze. Return to the oven for the final 10-15 minutes of baking. You'll know they're done when the internal temperature reaches 175°F and the skin is crispy and caramelized. The glaze should be bubbly and glossy, not dry or burnt. If it starts to darken too quickly, tent the pan with foil to prevent over-browning.
Rest and Garnish for the Finishing Touch
Remove the chicken legs from the oven and transfer them to a serving platter. Let them rest for 5 minutes before serving. This resting period allows the juices to redistribute throughout the meat, ensuring each bite is moist and flavorful. While they rest, sprinkle with 1 tsp sesame seeds for added texture and visual appeal.
The result should be chicken legs with crispy, caramelized skin that gives way to tender, juicy meat underneath. The glaze should be sticky and glossy, perfectly balancing sweet and savory flavors. Serve immediately with steamed rice and your favorite vegetables to complete the meal. The aroma alone will have everyone gathering around the table!
Pro Tips For Making Baked Teriyaki Chicken Legs
- Pat the Legs Dry: I learned this the hard way—wet chicken skin won’t crisp, no matter how long you bake it. Grab paper towels and really dry those thighs and drumsticks before tossing them in the sauce. The extra 30 seconds now means golden, crackly skin later.
- Bake at 400°F First: Start your chicken legs on high heat for 20 minutes—yes, even if the recipe says 375°F. This gets them searing and locks in moisture so they don’t dry out when you lower the temp to finish. After that, drop it to 350°F and let the teriyaki sauce caramelize properly.
- Use Less Sauce: Teriyaki sauce is sticky and sweet, which means it burns faster than you’d think. Brush on just enough to coat the chicken—about 2 tablespoons per leg—and reserve the rest for glaze later. You’ll save yourself from cleaning charred sauce off the tray.
- Add Garlic Late: If you mince the garlic with the other aromatics, it’ll turn bitter by the time the chicken’s done. Instead, toss the minced garlic into the teriyaki sauce right before basting the chicken in the last 10 minutes of baking. Fresh, bright flavor every time.
Best sauces and condiments for these flavors
Homemade Glaze Secrets
My grandmother's trick was to thicken the glaze with 1 tsp cornstarch mixed with 2 tbsp brown sugar and 1 tbsp rice vinegar. This creates that signature glossy finish without making it too sweet. I like to simmer my homemade glaze for 3-5 minutes until it coats the back of a spoon—this ensures it'll stick beautifully to the chicken. For extra depth, add ½ tsp grated ginger or 1 minced garlic clove to the glaze before brushing it on. 🌿
Store-Bought Shortcuts
Don't have time to make glaze from scratch? Kikkoman Teriyaki Sauce works perfectly—just thin it with 1 tbsp water and simmer for 5 minutes to reduce. I also love Lee Kum Kee sweet and sour sauce for a tangier twist. For a smoky flavor, add ½ tsp smoked paprika to your glaze. Just avoid pre-made glazes with high-fructose corn syrup—they'll burn too quickly in the oven.
Sweet-Savory Balance
The key to teriyaki is balancing sweetness with acidity. I always include 1 tbsp rice vinegar in my glaze to cut through the honey. For extra tang, add ½ tsp lemon juice or 1 tsp mirin. If your glaze tastes too sweet, add another splash of vinegar or a pinch of red pepper flakes for heat. The perfect ratio is 2 parts sweet to 1 part acidic—trust your taste buds to guide you!
Spice Variations
Want some kick? Add ½ tsp gochujang (Korean chili paste) to your glaze for a sweet-spicy depth. For heat lovers, mix in ½ tsp sriracha or 1 tsp chili crisp. My favorite subtle spice combo is ½ tsp grated ginger + ¼ tsp cayenne—it adds warmth without overpowering. Always taste as you go, especially when using spicy ingredients. 🌶️
Extra Crispy Skin
For that restaurant-quality crisp, pat the chicken legs completely dry before baking and let them sit at room temperature for 15 minutes before going in the oven. I also like to sprinkle ½ tsp kosher salt directly on the skin before the final glaze application. For extra crunch, broil for 1-2 minutes at the very end—just watch closely to avoid burning!
Nutrition facts
Frequently asked questions
Why do you recommend bone-in, skin-on chicken legs?
The bone keeps the meat juicy while cooking, and the skin becomes wonderfully crispy when baked properly. Without the bone, the chicken would dry out faster, and without skin, you'd miss that satisfying crunch. It's worth the extra effort for the restaurant-quality texture!
Can I use chicken thighs instead of legs?
Chicken thighs work beautifully—just adjust the baking time to 40-45 minutes total since they're more tender. The skin will still crisp up nicely, and you'll get that same juicy, flavorful result. Thighs are also more forgiving if you're short on time.
How do I prevent the glaze from burning?
Watch the oven closely during the final 10-15 minutes—if the glaze darkens too quickly, tent the pan with foil. A light glaze application is better than a thick one that burns. For extra insurance, reduce your oven temp to 375°F during the last 5 minutes of baking.
What's the best way to reheat leftovers?
Place leftovers in a 350°F oven for 10-15 minutes with a splash of water or broth to keep them moist. Avoid the microwave—it makes the skin soggy. For extra crispiness, broil for 1-2 minutes at the end. Store leftovers for up to 2 days in the fridge.
Can I make this recipe in an air fryer?
Yes! Cook at 375°F for 25-30 minutes, flipping halfway and brushing with glaze at 15 minutes**. The air fryer gives you crispy skin with less oil, but you'll need to check frequently to avoid drying out. The oven method still gives slightly better caramelization, though!